If you are building a website for business purposes, or even professional blogging, what better way to connect with your customers or audience than through a contact page? It is a convenient, easy and fast way for your readers to get in touch with you without leaving the page. Oh, did we mention that you don’t even need to type in a word of code to integrate a contact page? Check out our step-by-step tutorial below for the complete How To.
Why You Need a Contact Page
So why do you need to have a contact page on your site in the first place, as opposed to, for instance, your phone number or email?
- It saves everyone’s time – With a well-done contact form, you save the time and effort that you’d otherwise spend on back and forth conversations. You can ask the sender to include all the details of their inquiry and their contacts for a comprehensive reply.
- Keeps spammers away – Spam bots are known to trawl the Internet looking for email addresses to spread their spam ‘gospel’ to. Posting your email address is thus like an open invitation to unwanted mail. With a contact form, only real people will be able to message you, and you can then reply to your email.
- Makes your site look professional – Having a page that includes contact information like physical address, business hours and any other relevant information will leave a good impression on your customers’ eyes. They will consider you more professional and legit as scammers hardly remember to put any of the mentioned information. Sites advertising professional services like LinkedIn and theessaywriter.net have the same structure.
Step-by-Step Guide to Creating a Contact Page
You can customize your site and take advantage of the opportunities named above and others in the following simple steps:
Step 1: Shop for a Suitable Plugin
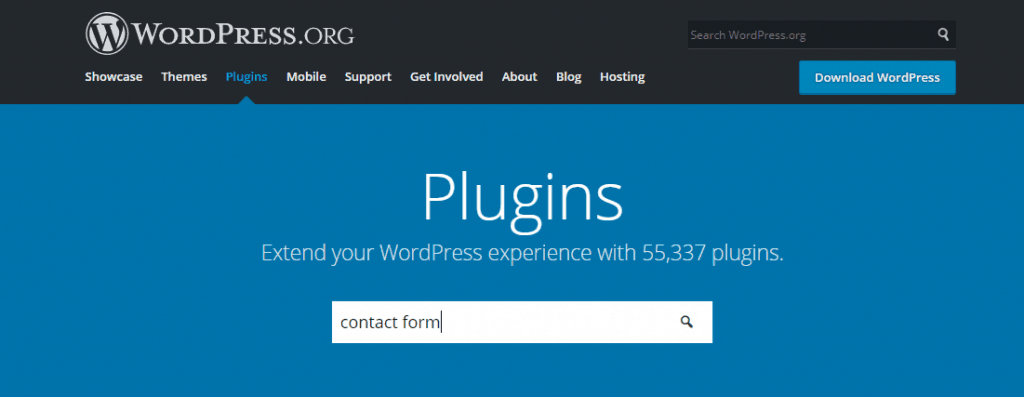
Naturally, the first step in the process is looking for a suitable contact form plugin from the WordPress plugin directory which shouldn’t be hard. There are thousands of free and premium plugins offering different features, and it all depends on your preferences and budget. Examples of popular plugins which provide a great experience are; WPForms, Contact Form 7 and Gravity Forms. We recommend dedicating enough time and effort on this and check out what other users are saying about your preferred plugin.
Step 2: Install the Plugin
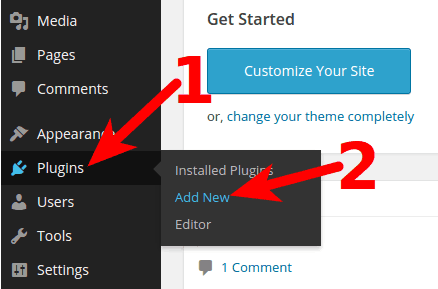
In case you didn’t know (I know, I know), you can install plugins on your WordPress site by going to your dashboard and clicking on the Plugins>Add New option. If you are still undecided on the contact form plugin to use, you can browse through the Featured, Popular, Recommended and Favorites lists on the next page. Otherwise, type your chosen plugin in the search bar and click on the Install Now tab when it appears, and you’re done. Oh, and don’t forget to activate your new plugin before proceeding with the next steps.
Step 3: Create a Form
Now it’s time to put your plugin to the test. From your WordPress dashboard, go to the plugin menu, and it will give you an Add New option. Do the necessary. Depending on your plugin, a drag and drop form builder will launch, and you can then get to work after choosing a name or title and the form template. Other essential features of a contact page you should try to include are:
- Email, Phone, and Physical addresses – Does a Contact Us page without these even make sense?
- Social media pages – Social media is increasingly becoming the preferred means of communication between people and organizations. One study showed that 48% of Americans have interacted with a business on social media. If your company doesn’t have a social media presence, it’s time to get one!
- Photos – Adding photos and images of your premises, staff or products shows seriousness and will linger in the reader’s mind for a long while.
- Directions/Location – If you have a physical office, it will be more useful to give directions or have a Google Map showing the location as opposed to merely giving an address. The best way to do it is by using our Google Maps Widget Plugin. After installing and activating the plugin, go to Appearance>Widgets menu and drag the Maps Widget to the sidebar and after that press the Settings button. While there, enter your office address and choose the size, zoom level and pin color of your map then click Save after you finish. Your customers will now be able to trace your address using their mobile devices.
Simply put, do whatever you have to do within the limitations of your plugin, and remember to save the settings when you finish.
Step 4: Form Configuration
After creating the contact form to your preferences, the next thing is to configure the front-end message confirmation and notification settings. The confirmation message is basically what the sender sees on their end after clicking on Send Message button. The default setting for this is mostly Thank You for Your Message, but you can have a custom one if you’re cool like that. Form notification, on the other hand, covers how you are notified when someone leaves a message. You can access this menu through Settings>Notifications.
Step 5: Finishing Up
After you edit and configure to your heart’s content, you can now add the form to your sites. On your WordPress dashboard, go to the Pages>Add Form tab and select the contact form. A new page will be created with the contact form shortcode. Save and preview.
In Summary
WordPress is the easiest CMS software to navigate which explains why millions of developers and users love it. With an unlimited number of plugins and widgets available, you can create, customize and update your WordPress site in any way you want even with basic programming skills.
We hope that our guide above is helpful enough; and where things are not clear, you can always reach out to us through our contact form!