

Whether you’re organizing a scenic road trip, delivering packages for your small business, or simply trying to make multiple stops efficiently on the way to your weekend getaway, Google Maps Trip Planner is a powerful tool that can turn a complicated travel itinerary into a seamless journey. With just a few taps or clicks, you can plan routes, insert multiple destinations, get estimated travel times, and even factor in public transport or walking segments.
Let’s dive into how you can plan the perfect route using Google Maps with multiple stops, and discover a few pro-tips that will make your route planning smoother and more efficient.
Why Use Google Maps for Trip Planning?
There are many navigation platforms available, but Google Maps remains a top choice for a few good reasons:
- Real-time traffic updates: Helps you avoid congested routes and save time.
- Multiple transport modes: Plan routes via car, public transit, biking, or walking.
- Frequent updates: Maps are regularly updated with new routes and stops.
- Street View & Satellite: Visualize your route for better orientation.
Whether it’s a quick series of errands or an elaborate, multi-state road trip, Google Maps offers unmatched flexibility and accuracy.
Step-by-Step Guide to Planning a Route with Multiple Stops
Planning a route with various stops may sound cumbersome, but Google Maps makes it easy. Follow these steps to organize your journey:
1. Open Google Maps
Launch Google Maps on your desktop or mobile device. While both platforms support trip planning, the web-based version offers slightly more control and is better suited for more complex itineraries.
2. Start with Your First Destination
Type your first destination in the search box and press Enter. This becomes your trip’s starting point. If you’re beginning from your current location, you can simply type “Current Location”.
3. Click on “Directions”
This opens a new panel where you can input your starting point and your first stop. You’ll also see the familiar blue route line on the map.
4. Add More Stops
Click the “+” icon or select “Add destination” to include additional waypoints. You can add up to 9 extra stops (10 total destinations including the origin).
To change the order of stops, click and drag the destination points up or down in the left-hand panel. Google Maps will automatically update your route and adjust the travel time.

5. Choose Your Mode of Transportation
Above the destination fields, choose your travel mode: Driving, Transit, Walking, Bicycling or Flights. Each mode affects your estimated arrival time and suggested routes.
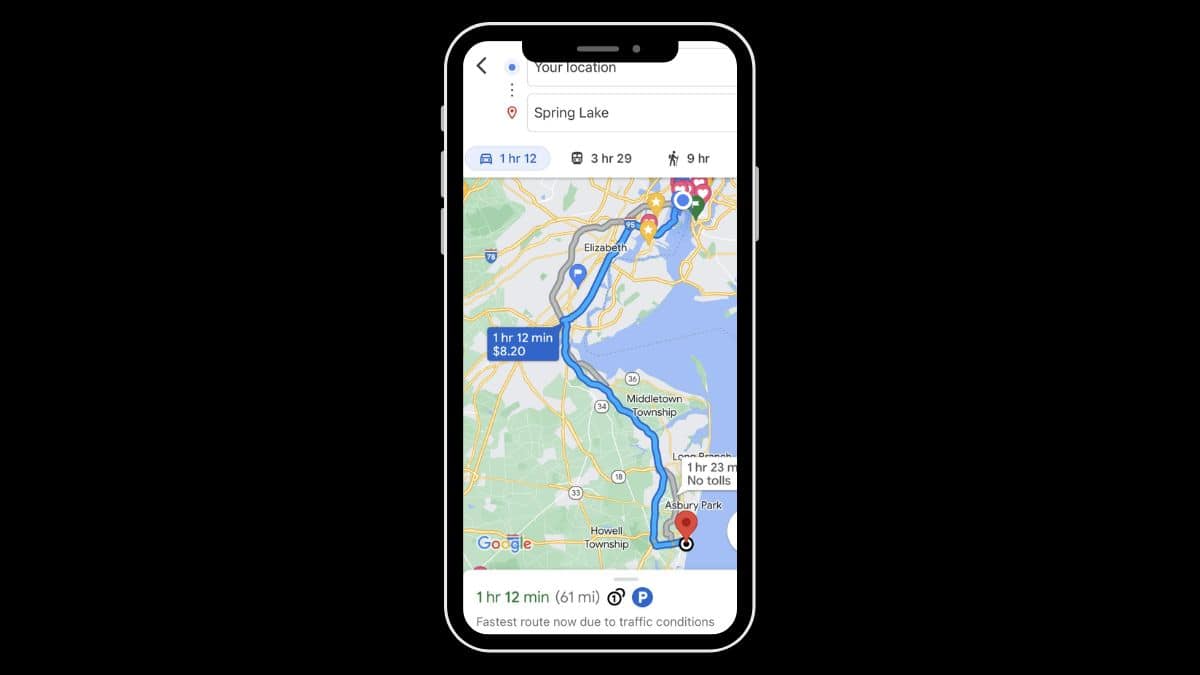
6. Review and Customize Your Route
Once all destinations are entered, review the entire trip. Look out for:
- Distance and Estimated Time: Displayed under the travel mode, this provides a realistic frame for your time on the road.
- Alternative Routes: Usually outlined in grey, these help you explore faster or more scenic paths.
- Live Traffic and Road Closures: Orange or red lines signal traffic congestion. If you’re planning ahead, Google estimates normal conditions, which can shift based on the time of day.
Save and Share Your Trip
Once your route is perfected, don’t forget to save it! While Google Maps doesn’t yet allow saving an entire multi-stop trip as a single file within your account, there are other helpful options:
- Share Your Route: Click “Share” to generate a URL link. Send it to travel companions via email or message so they can follow along.
- Send Directions to Your Phone: If you’re planning on desktop but navigating on mobile, use this feature to transfer the route seamlessly.
- Create a List: Use Google’s “Lists” feature under “Saved” to mark your must-visit places ahead of time.


Use Google My Maps for Advanced Planning
If you’re looking for something even more powerful, Google My Maps is your best ally. Unlike standard Google Maps, this tool allows you to save, customize, and organize complex itineraries over multiple days or themes.
With Google My Maps, you can:
- Create multiple layers for different days or types of activities (restaurants, landmarks, hotels).
- Add custom icons, notes, and color coding for enhanced clarity.
- Collaborate with friends or team members on the same map.
- Export or import maps as KML/KMZ files for offline or platform use.
To access My Maps, visit Google My Maps and sign in with your Google account.
Tips for Planning the Perfect Multi-Stop Route
1. Prioritize Stop Order: Google Maps lets you reorder stops, but being strategic can cut down on travel time. Plan geographically to avoid unnecessary backtracking.
2. Optimize for Time of Day: Traffic wakes and wanes throughout the day, so avoid peak hours when possible. Google Maps considers this in its time estimates — but double-check using the “Depart at” or “Arrive by” feature.
3. Label Your Destinations: Instead of generic names like “Stop 1,” update each location’s label (on My Maps) so you remember what each stop represents and why it matters.
4. Check Reviews and Photos: Tap on location pins to see user reviews. It’s a great way to discover last-minute gems or avoid tourist traps.
Use Offline Maps for Remote Regions
When you’re venturing into areas with spotty network access, downloading offline maps is a game changer. Google Maps allows you to save map sections for access without Wi-Fi or data.
Steps to download an offline map:
- Go to the Google Maps app on your phone.
- Search for the city or region.
- Tap the name or address at the bottom.
- Select “Download”.
This will ensure you always know where you’re going, even if you’re deep in the mountains or traveling through rural areas.
Common Pitfalls to Avoid
- Not Saving Your Route: Multi-stop plans can disappear after closing the Maps app. Always share or send the route to your device before heading out.
- Exceeding Stop Limit: Standard Google Maps only allows 10 total points. For more stops, consider breaking the route into segments or using My Maps for long trips.
- Forgetting Time Zones: On multi-state or international routes, remember that arrival times are shown in the destination’s time zone!
Final Thoughts
Google Maps is more than just a navigation tool—it’s your digital co-pilot for every journey, big or small. With intuitive features and real-time updates, trip planning becomes not just easier, but enjoyable. Whether you’re mapping out adventure trails, hitting all your favorite taco joints, or organizing a professional delivery run, the multi-stop feature ensures you stay on path and on time.
So go ahead—explore, plan, map, and most importantly—go places. Let Google Maps handle the directions while you create the memories.