
When using multiple pins, one can easily clutter the map by having too many pins in a small radius. But if you have to display all of those pins, you have no choice. But that doesn’t mean that your map has to look messy and that one pin has to go over another one.
To solve this problem, we have updated Google Maps Widget PRO with a Clustering option.
What’s Clustering?
Clustering is a method of grouping pins based on their distance from the current view. When there are multiple pins shown on a map, this method declutters the map by grouping pins.
So, instead of showing ten, twenty, or a hundred pins that are very close to each other, by enabling Clustering, you can show just one special pin that displays the number of clustered pins below it. This is different than Pins Filtering that allows you to show only grouped pins. Take a look at this example.
Example: Starbucks in New York City with clustering

How to enable Clustering in Google Maps Widget PRO
Clustering is done automatically. You just have to enable the feature and decide the radius that will be affected by the method.
- Go to Appearance -> Widgets and edit your Google Maps Widget
- Open the Interactive map settings (the second tab)
- Choose a cluster radius (small, medium or large)
- Save changes
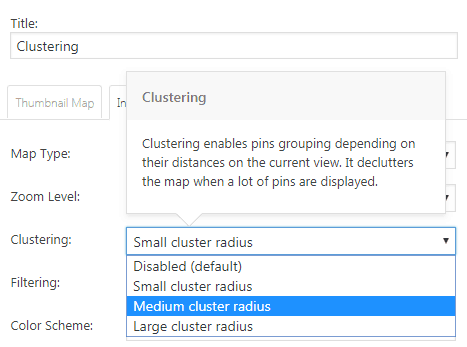
What are the differences between cluster radiuses?
The Clustering technique works pretty much the same in all settings. The only difference is the distance it uses when grouping pins:
- Disabled (default) – pins aren’t grouped together
- Small cluster radius – pins are grouped only when map is zoomed out
- Medium cluster radius – pins are grouped together
- Big cluster radius – pins get grouped even when you zoom in more closely on the map