Are you looking to create order forms on your WordPress site but can’t seem to figure it out? Well, you’re in luck as I’ve got a solution for you. Unfortunately, by default, WordPress doesn’t allow you to create these types of forms. However, you can bypass this by using one of the many WordPress plugins out there.
Using a WordPress plugin will allow you to create forms with or without the payment option. All online (e-commerce) businesses should try to boost their sales margins, and this is a good way to start. Enable your visitors and/or customers the ability to buy your products right off the bat. Don’t make them have to go through multiple pages and clicks just to be able to purchase something. The easier it is to purchase something, the more tempting it gets to go through with it.
Build unique order #forms, attract more customers, earn and collect more money securely with the help of a free and extremely powerful #WordPress plugin.@wpmudev Click To TweetBenefits of Having Order Forms
Having an order form allows your customers to fill out the required details and purchase a product from your website. Think of it as a certified document for completing the purchase that allows and commits the seller to send you the goods/products you paid for.
You can…
- receive orders from your customers
- showcase your products/services
- point out the price
- gather customer contact details
- simplify making orders for your customers
As I have mentioned previously, I’ll be using a WordPress plugin to create order forms, and my plugin of choice is Forminator.
Forminator – Payment, Quiz and Contact Form Plugin

Forminator is a free WordPress plugin that serves as an expandable form builder for WordPress sites. They claim, and I’m sure that many would agree with this to be the easiest way to create any type of form.
Create contact forms, feedback widgets, as well as interactive polls with real-time results, quizzes, service estimators, and even registration forms with the ability to collect payments through PayPal and Stripe.
No matter if you’re just trying to sell or promote products, gather donations, or book an appointment, Forminator does all of that for free.
Thanks to its precise and user-friendly drag-and-drop visual builder, you don’t need to have any coding knowledge to use it. Easily collect customer’s personal details such as first and last name, email, phone number, make interactive content, and boost conversions. You can store and organize submissions, sort out, and manage them while automatically complying with the GDPR or other privacy policies.
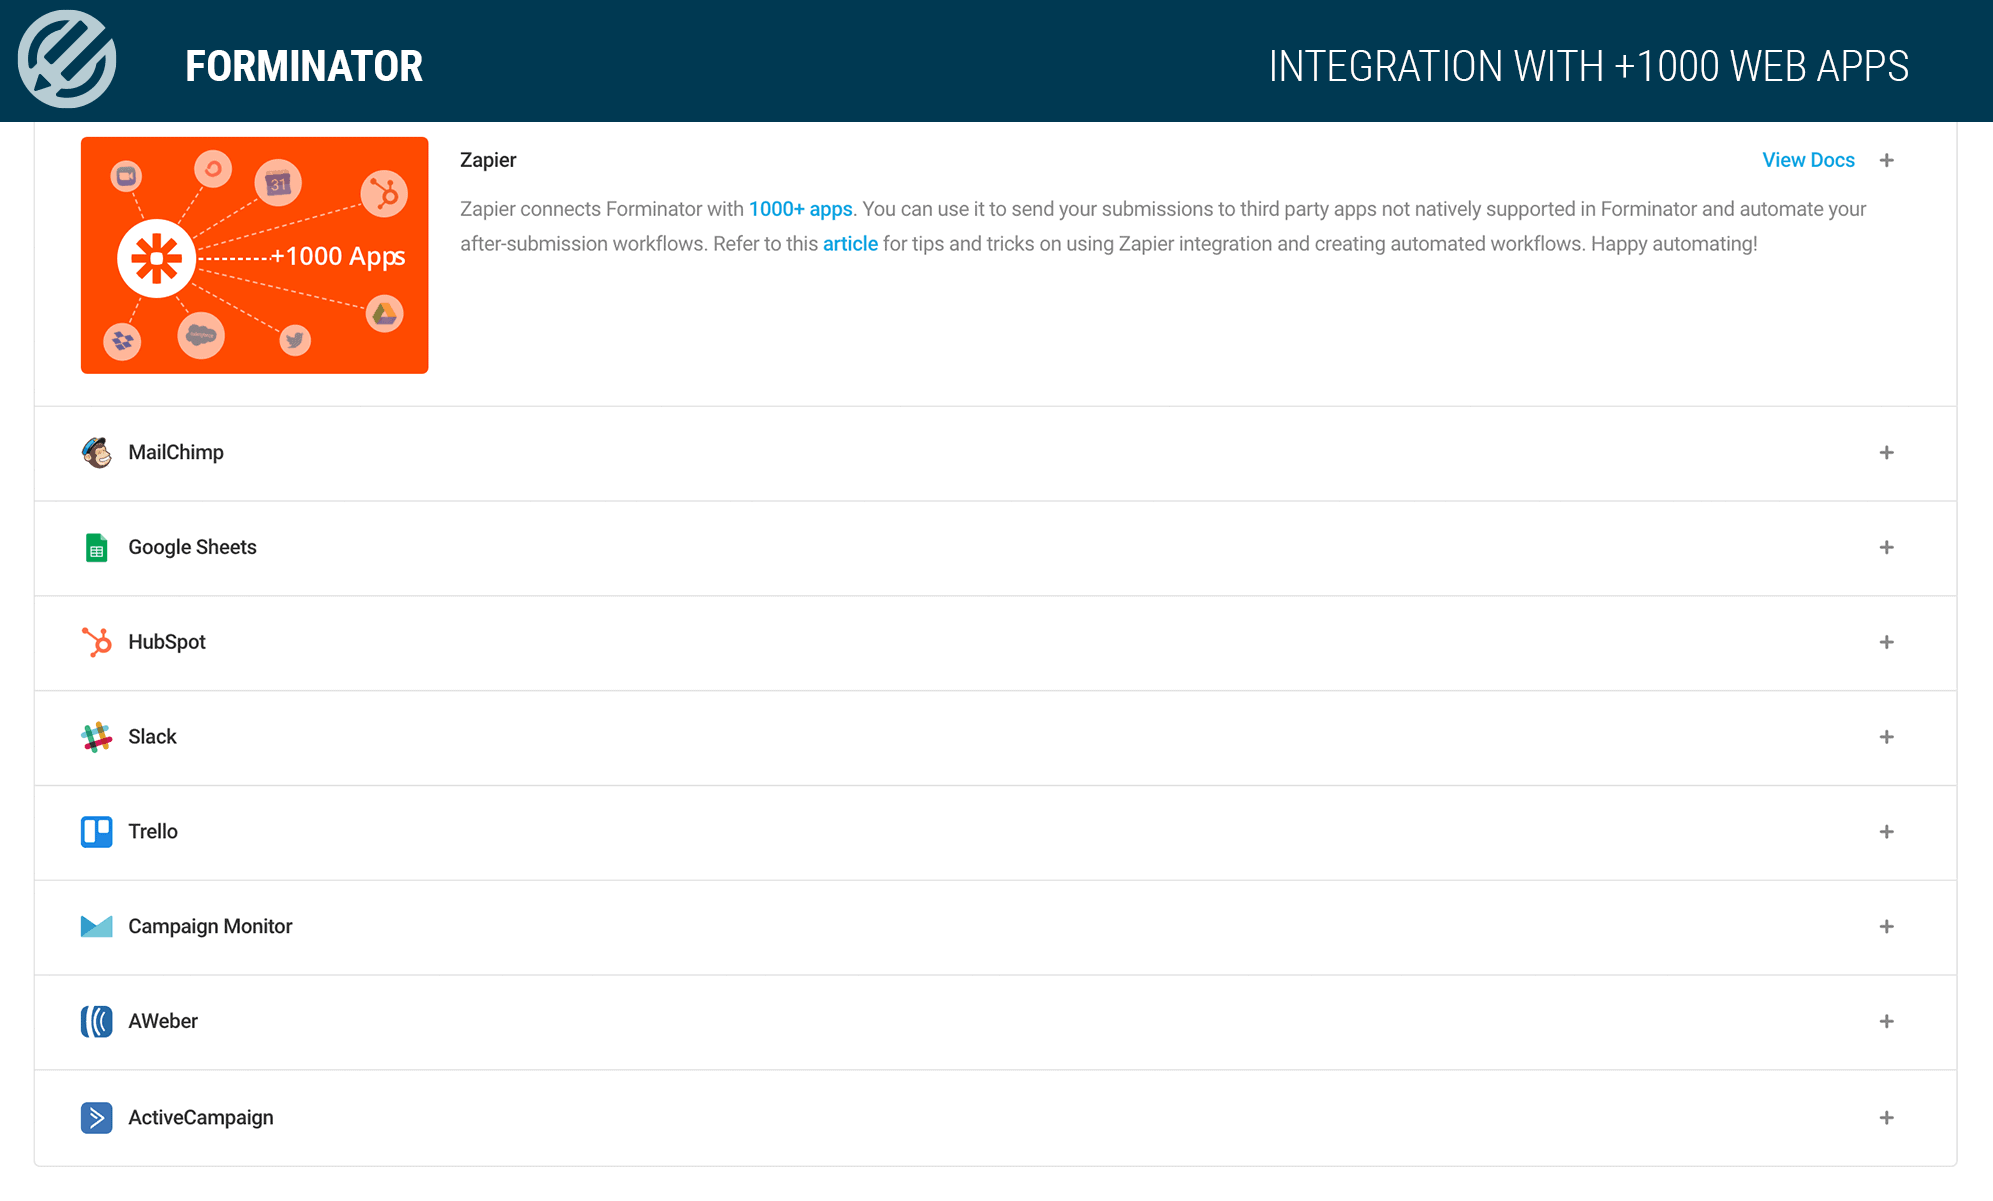
The plugin supports third-party integrations such as email services, CRM, storage, project managers, and has over 1000 apps included.
Shortly, we’ll go step-by-step on how to use Forminator to build an order form and set it up to collect payments through Stripe or PayPal. Don’t forget to activate the Forminator payment module to enable fixed and variable payments.
Step 1
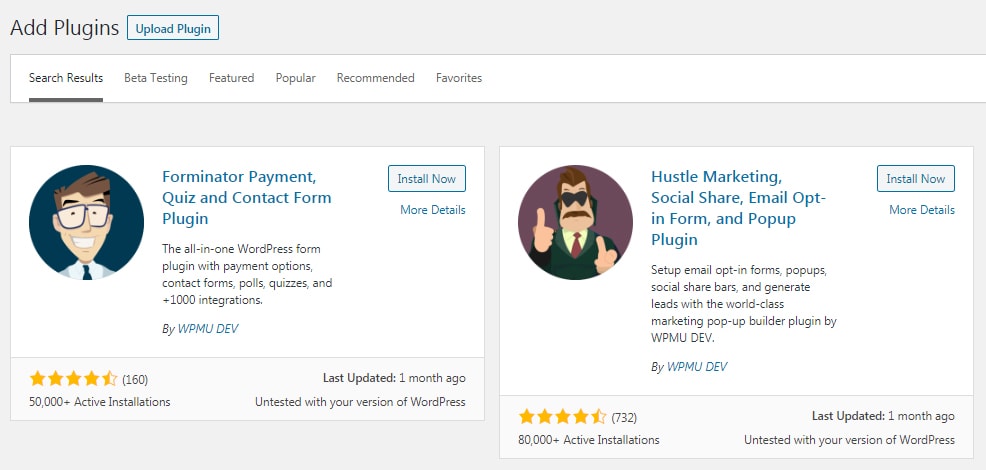
First, we need to install Forminator, and you can do that through the WordPress dashboard by going to “Plugins”, “Add New” and then type in “Forminator” inside the search box. Finally, click on the “Install Now” and “Activate” button to initialize the plugin.
Once you’ve successfully activated the plugin, you can start using its features.
Step 2
Open Forminator’s dashboard, and you’ll see, well, a bunch of nothing as you haven’t created anything. However, this is where you can start creating forms and polls. Once you’ve created a few forms and collected user entries, you’ll start to see your numbers growing.
It even shows metrics that help you track the performance of your forms. Unfortunately, it doesn’t have the built-in A/B testing functionality, but you can still compare the conversion rates if you know what you are doing.
To create a form or poll, click on the blue “+ CREATE” button.
Step 3
When you start creating a form, a window should pop-up, and this is where you set your form’s name. Assign a name to your new form and click on the “Create” button.

Step 4
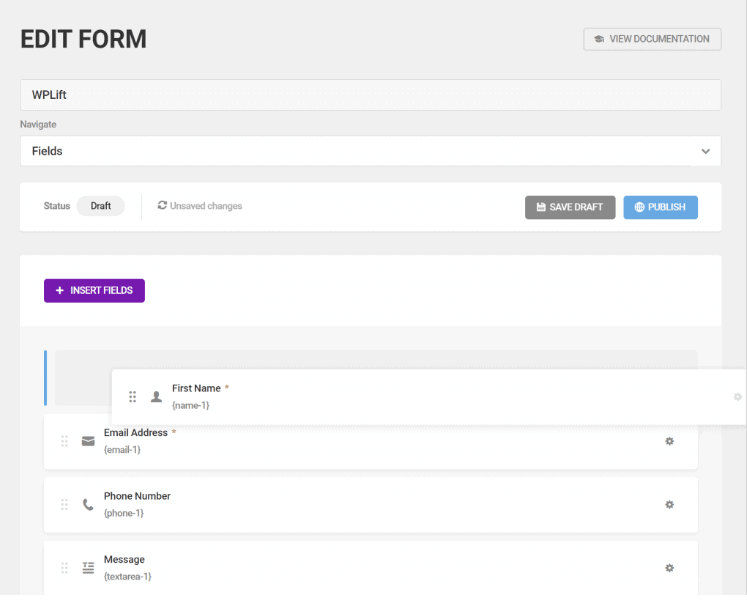
As you can see, the form fields are predefined, which can be changed or removed as they are fully customizable. You can also add other fields if you wish to.
Keep in mind that fields with an asterisk sign are the required fields and must be filled out by the user to submit the order form.
Step 5
Adding or editing form fields is easier than ever before. Keep the fields that you want/need and start editing them by clicking on their gear icon. You should be able to edit, duplicate, and delete fields. Don’t forget that you can drag fields to place them in your desired order. For example, you can drag “Phone Number” and place it to the right of “Email Address,” so they are shown side by side, and you get a two-column row.
Design your forms the way you want by using rows and columns.
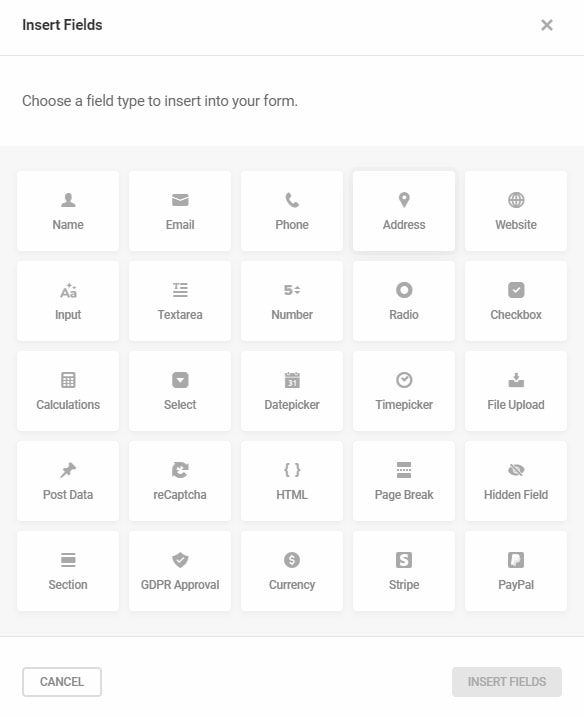
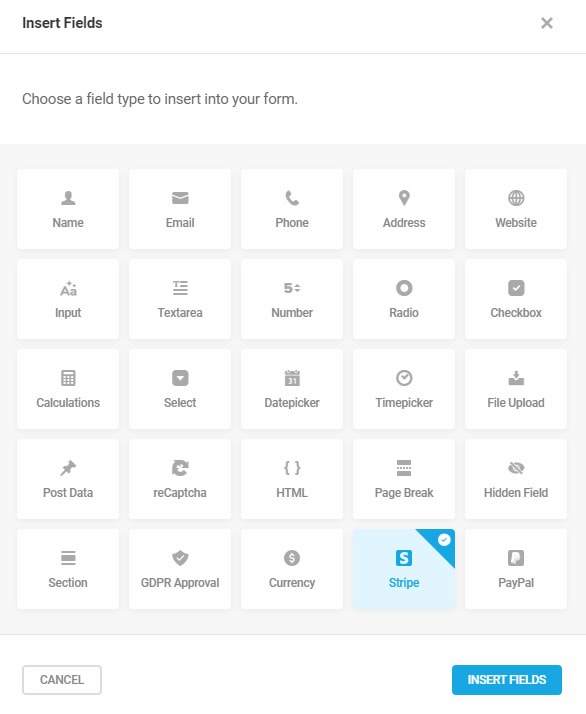
Once you’re done with the design, click on the “Insert Fields” button, and a window with the field options should pop up on your screen. If you’re looking to create payment forms, you must include the shipping address to be able to send your product, and this can be done by selecting “Address” and clicking on “Insert Fields” at the bottom.
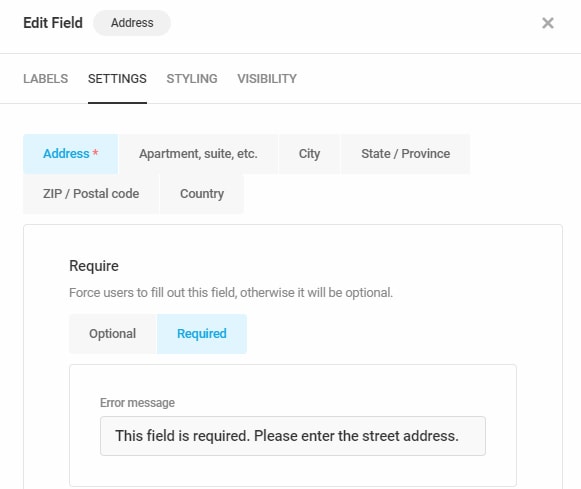
Good, now click on the “Address” field, and its field settings should pop up on your screen.
From the “Labels” tab, you can turn on or off various address subfields as they come enabled by default.
Go to the “Settings” tab and set all of the address fields as required to be able to ship your product correctly! Click on “Apply” to save changes.
Step 6
To receive online payments, we have to activate the “Stripe” option. We can do that by clicking on the “Insert fields” button, selecting “Stripe”, and pressing the “Insert fields” button at the bottom. The same should apply if you want to use PayPal, but keep in mind that you can use one option at a time. Forminator is a Stripe verified partner, and this allows you to get the most out of Stripe integrations, so it is more commonly used as a payment option.
Keep in mind that you must have an activated Stripe account connected to Forminator to edit this field.
If you see a warning like this, don’t panic as you can easily set up and connect your Stripe account to Forminator by going to Settings → Payments → Stripe.
Once you’ve got Stripe all set up, click on its field settings to set the payment amount for your product.
You have two options for the payment amount – fixed or variable. If you’re selling a single (identical) product, select the fixed option. Still, if you have multiple variations of a product or if tax and shipping need to be added to the price, you should select the variable option. The “fixed” option is used more often, and I’m going to use it as well.
Upon selecting the options that best suit your needs, enter the amount which is in USD unless you change the currency.
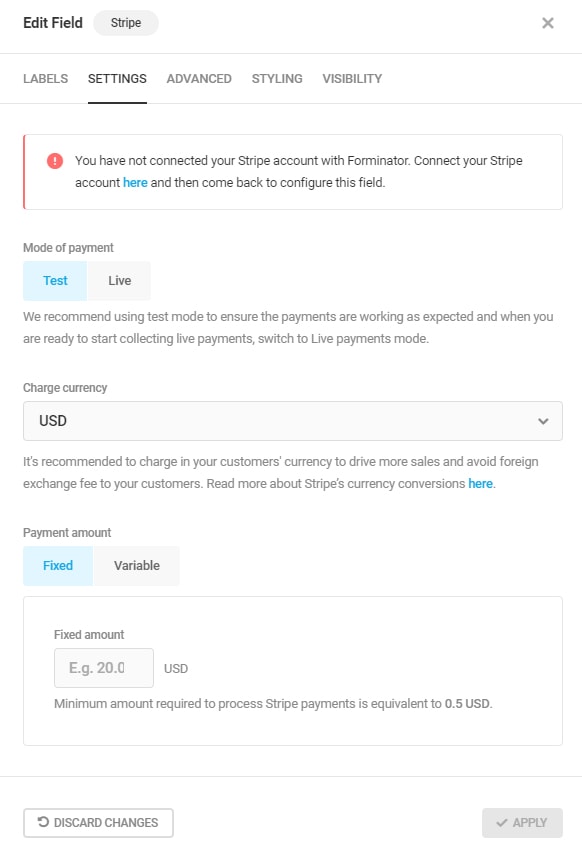
We’ll leave the “Mode of payment” as “Test” for the time being, and once you want your order form to go live, well, you’ll select the “Live” option.
Preview your freshly made order form and check if you’ve placed everything where it is supposed to go, and that it works properly.
If you wish to, you can change the submit button to say anything you want by clicking on the “Send Message” field and editing the button text to your liking.
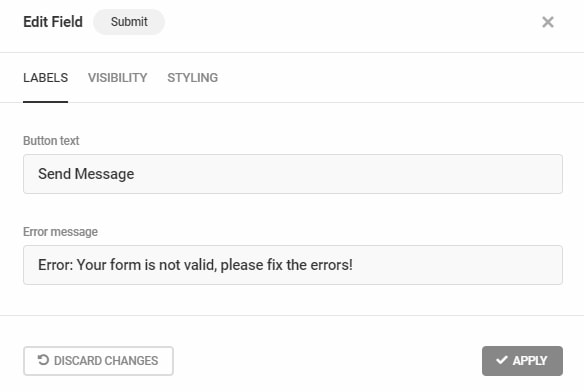
Click on “Apply to save changes.
Step 7
You should have successfully created the form by now, and I think that a congratulations is in order. You might be pleased with the form’s appearance, but if you’re not, you can customize it by clicking on the “Appearance” button at the bottom.
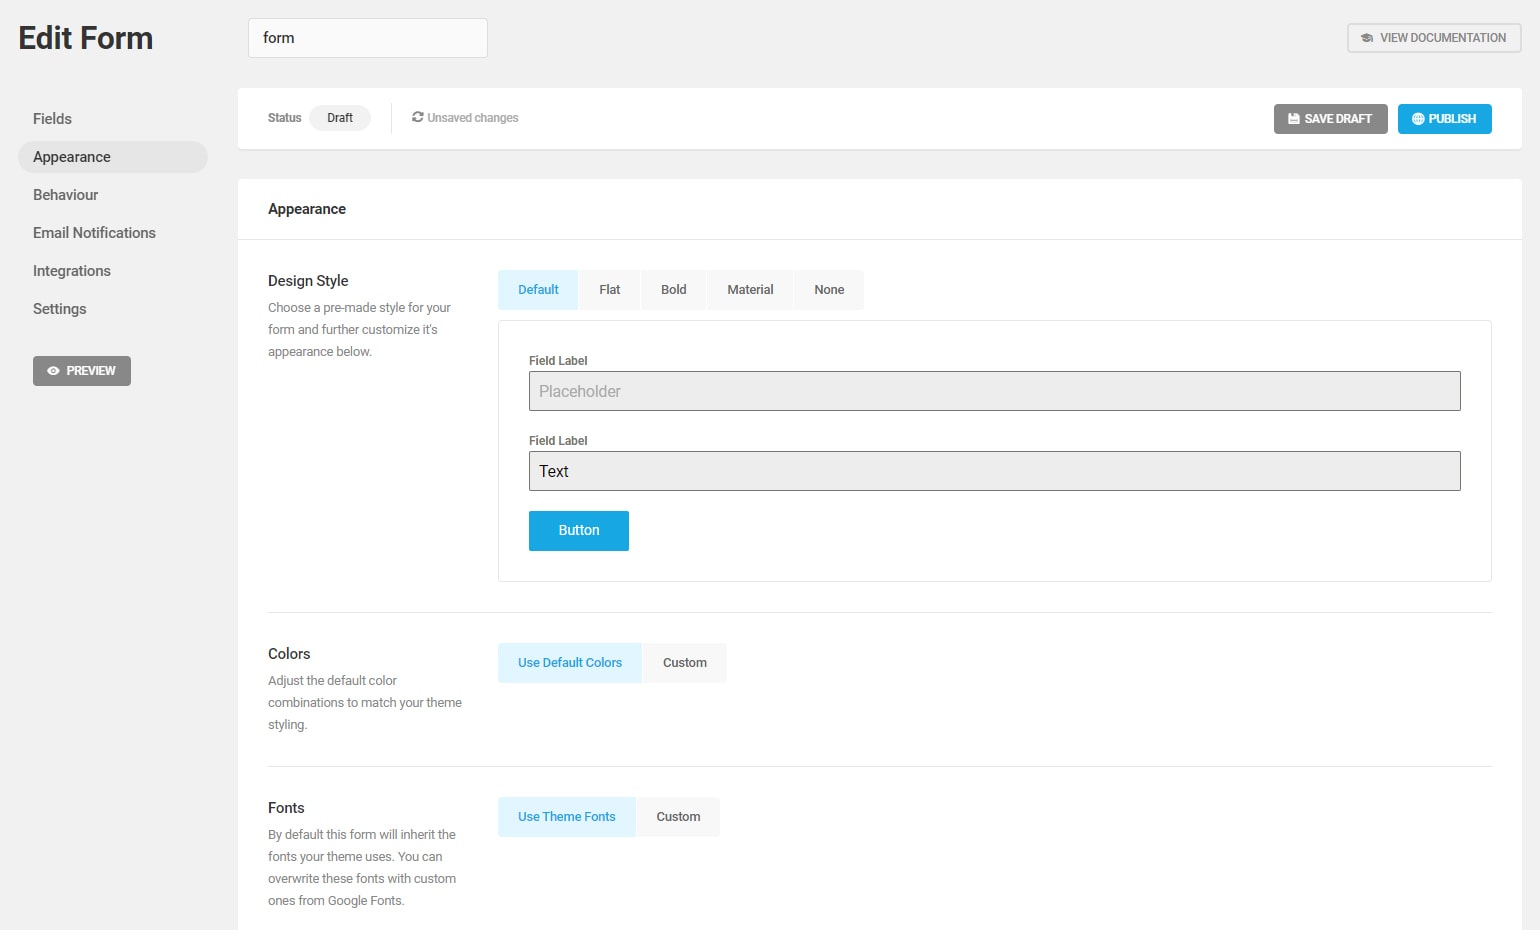
Forminator allows you to customize your form’s design style, colors, borders, spacing, fonts, form containers, you name it. It even supports custom CSS for more advanced use cases. Easily create forms that match most themes out there.
Colors – use the default colors or select custom to change background and text colors.
Fonts – customize the type, size, weight
Form Container – customize the form’s appearance by adding borders, paddings, and spacing
Custom CSS – advanced customization options
Configure the submissions behavior, payments, and security features.
Decide how the form will behave after the submission. For example, by default, it shows a success message that disappears after 5 seconds or after your set time.
Display a custom message, redirect users to a new page, or simply hide the form if you wish to.
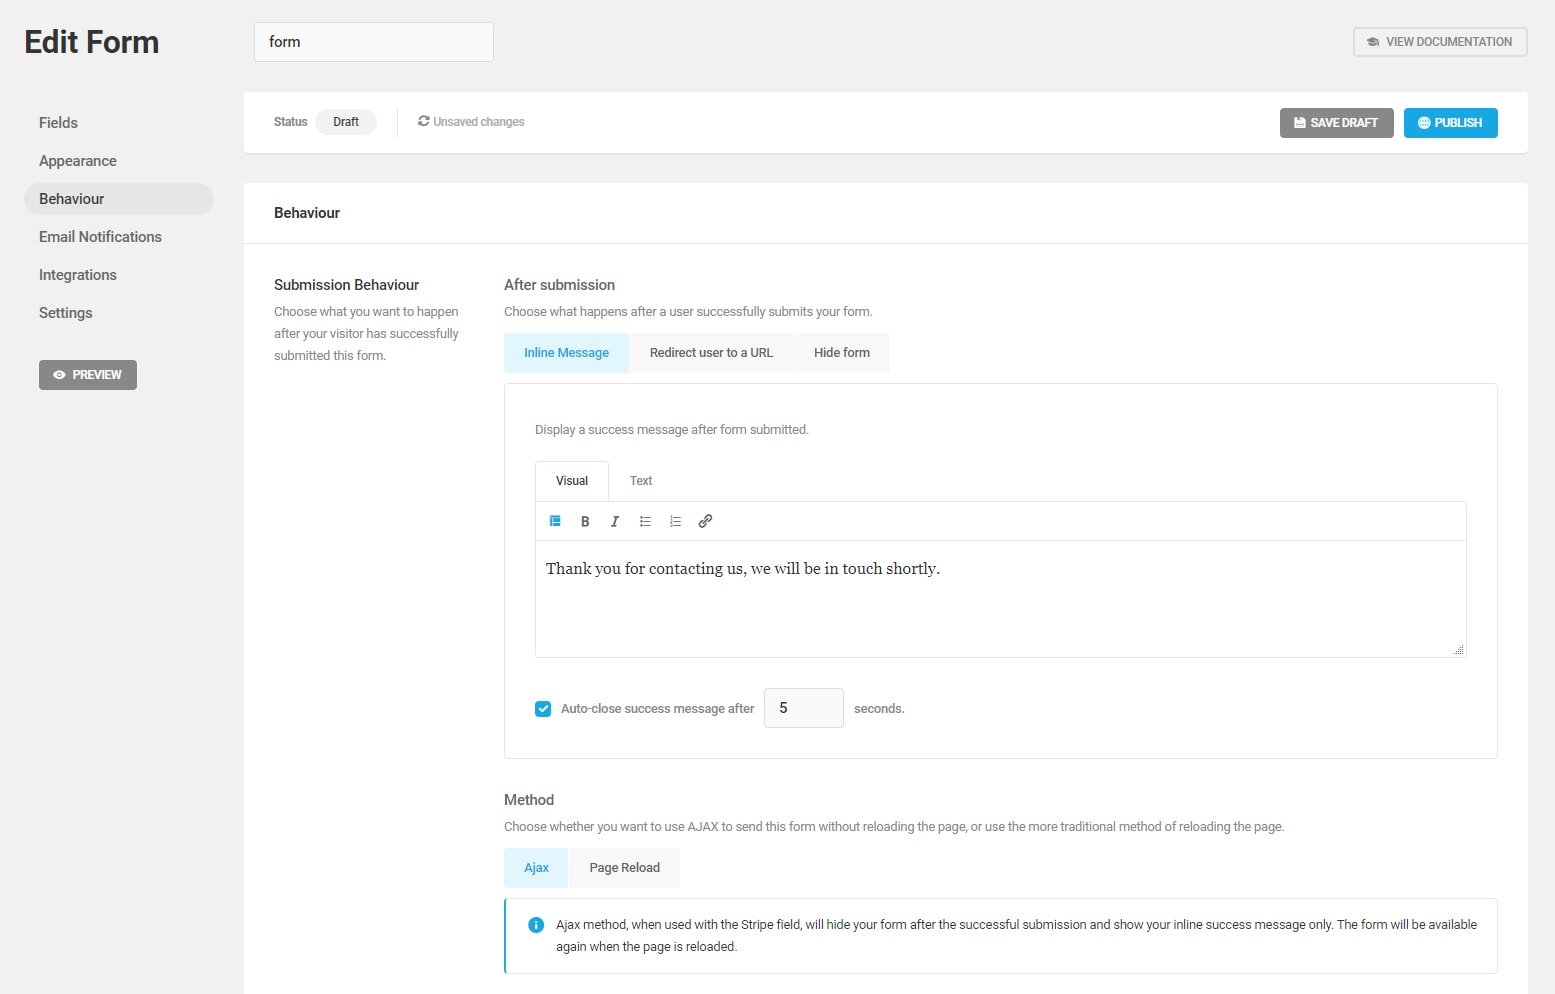
Enable the “Require SSL certificate to submit this form” option to collect payments securely.
Send email notifications to admin users such as yourself or any other site admin.
Sending automatic order confirmation emails to users after filling out a form is recommended as well, but make sure that the recipient is set to “Email Address”.
WPMU DEV members are given up to ten free email accounts that are easily configurable. First, sign up for a trial, and once you’ve created a hosting account, you’ll get simple email account creation and management, unlimited email forwarding, 24/7 expert email support, and easy integration with email clients.
Integrations are supported and easily activated. Integrate with numerous email and storage apps such as MailChimp, Campaign Monitor, Active Campaign, Zapier, Google Sheets, and more. Don’t forget to connect your apps with Forminator before integrating them into a form!
Open and configure the settings to disable/enable store submissions in the database or customize privacy options.
As forms collect personal information, you have the option to delete form submissions once they reach a certain date automatically.
Once you’re done customizing your order form, click on “Publish” to finish.
Step 8
Since now you have successfully created, customized, and published your order form, you have to insert the shortcode on your site for it to display the form to users.
The shortcode should be on your screen right now, and you can copy it from there. If you don’t see the shortcode, simply go to Forminator’s dashboard and copy the shortcode from there.

Step 9
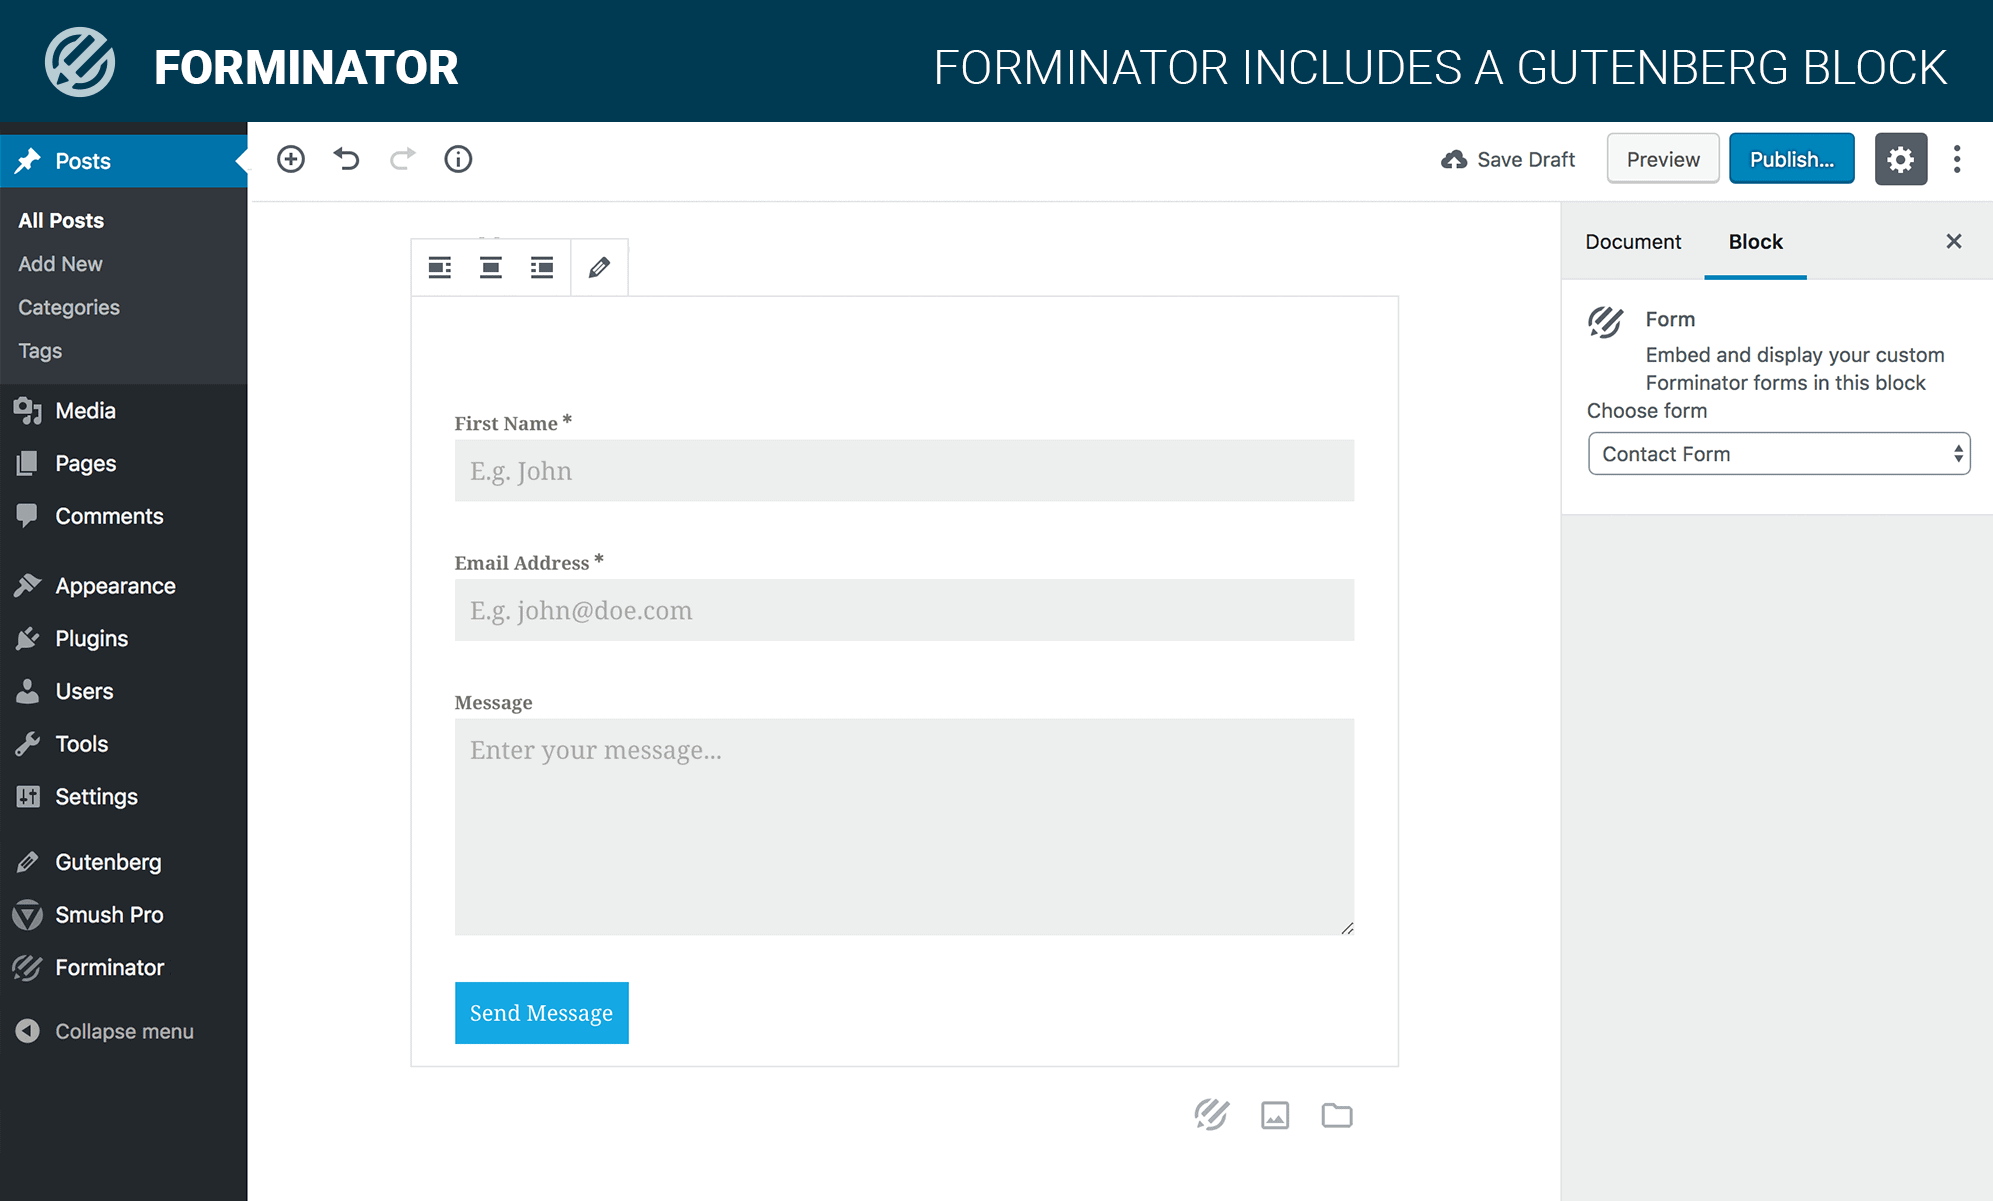
Add the shortcode to your post/sales page, save, and publish the changes so that users can start using order forms. If you are using Gutenberg to edit your posts and pages, you will be happy to know there is a Gutenberg block that lets you insert Polls, Forms, and Quizzes.
Tips:
If you’ve strictly followed this tutorial, the Stripe field in your order form should be set to “Test” mode. We used this method to test the payments, and if you’re ready to start accepting orders, simply change it to the “Live” mode.
Forminator stores your form submissions, and you can locate them by going to the dashboard, clicking on the gear icon on the right, and selecting “View Submissions”.
You’ll automatically get email notifications for any new orders!
Need Help?
If you have any problems or questions regarding Forminator, you can contact their live chat support or submit a support ticket from the “Support” tab from the WPMU Dev dashboard.
Bonus – Quizzes & Polls
Besides powerful order and contact forms, you can also create interactive quizzes and polls.
To create a poll, simply ask a question and add possible answers. See more about how to create a quiz with Forminator.
Conclusion
Even though this whole process might seem tricky and time-consuming to go through, it is definitely worth your time! Order forms are crucial for online (e-commerce) businesses that sell goods/products on their websites. They allow you to simplify the purchase process by displaying forms at the right places at the right time and let you collect order payments through your WordPress website.
Forminator is built to conquer purchases and payments with ease, and since it does all of that for free, it is the best choice for your WordPress website. It lets you set taxes, shipping rates, and the form even calculates the final order amount automatically for you. Make it easier for your customers to make a purchase and get paid securely with this WordPress plugin. Hopefully, all has gone well, and you have successfully created an order form. If you have any questions or tips, feel free to leave a comment down below.