Writing is far from easy, especially when you know that what you have written will be read by thousands of people and shared hundreds of times on almost every social media platform imaginable. Besides the fact that the work of an author will get major attention and tons of feedback, writing is a difficult task because it requires a lot of preparation, thought and revision to be put into it.
Taking what we just said into consideration, crediting an author for their work should be a standard practice not only because it is what the author deserves, but because the author and your blog can get quite a few benefits from the simple act of adding an author bio box to your blog.
In this article, we will discuss, in-depth, what are benefits from adding an #author box, and will also give you a tutorial for the easiest method of adding an author #bio box to your #blog. Click To TweetBut before getting into all of that, let’s cover some of the basics regarding author bio boxes.
What are the author bio boxes?
Author bio boxes aren’t in any way complex elements of your WordPress site; they are usually sections of a smaller size placed at the bottom or the side of a page that will slightly stand out from the rest of the elements on it.
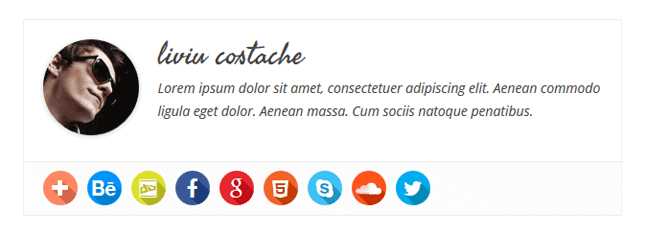
They can come in different shapes and sizes, depending on the theme that is activated on a blog but will, in most cases, consist of the author’s name, some basic information, their picture, a personal message along with an email address, and social media links.
The purpose of an author bio box is to let the readers know whose creative efforts are responsible for the post coming to life and also to, through the author’s basic info, provide proof that the author is, in fact, credible to talk about that specific topic.

You can add an author bio box using several methods. The first one is with the help of a built-in author bio box feature that comes with some blog themes. One downside of this method is that, in most cases, it will allow you to add an author bio box for only one writer, which is definitely not ideal for blogs that often have posts that are written by multiple authors.
The second method and maybe the “hardest” one is, of course, the manual method, which will require you to edit your blog’s code directly and add the author bio boxes using code snippets. This method is great for those of you that are comfortable with editing code and who might want to give the boxes a completely custom look.
Last but certainly not least is the plugin method. The tutorial we mentioned at the beginning of this article will be covering this method specifically, but because we believe that practical knowledge should be the freshest in your mind, before jumping into the tutorial, we’ll talk a bit more about why author bio boxes bear such importance and will leave the tutorial to be the icing on the cake.
Reasons why author bio boxes are so important
They give the credibility of your posts – The internet is a huge place, an inexhaustible source of information. Still, not all of that information is accurate, original, or useful in any way. That is why people are more and more hesitant about trusting what they read online, especially if the information is coming from an anonymous source. An author bio box will tell your readers, who is the person that is presenting them with the information, and after knowing that, they can decide for themselves whether to trust that particular author or not.
They make your blog more inviting to guest bloggers – Guest bloggers are great; they can help you generate content for your blog and add more variety to it with their own unique perspectives. What you want from guest bloggers is quality content, but what they want from you is exposure, which you can only provide them with if you have proper author bio boxes incorporated into your blog. Not many guest bloggers will want to contribute to your blog if they see that you aren’t crediting your authors in the right way.

They humanize your content – People love relating to someone, especially if that someone has a similar or the same point of view as they do. Through an author bio box, you will introduce them to a person they can relate to and share opinions with, give them the opportunity to discover more content from that author, and possibly even connect them (through social media links) so they can further discuss a certain topic.
They improve your blog’s SEO – Everyone knows that SEO is a big deal, but not everyone knows that Author Rank is one of the factors which will determine your level of SEO. So by not having an author bio box, what you are doing is basically unintentionally knocking your SEO down a notch.

They help you keep your current writers – Your writers work hard to provide you with high-quality content. If you aren’t showing your appreciation for them by at least putting their name on your blog loud and proud, then there is a big chance that they might take their skills and expertise to a blog that will actually do so.
They give you the power to boost someone’s popularity – As we said earlier, author bio boxes in 99% of cases will contain the author’s social media links. If an author becomes an audience favorite, he/she can acquire quite a fan base on the linked social media platforms and definitely won’t hesitate to give a shout-out to your blog posts every once in a while in return for the “fame” and exposure you helped them achieve simply by giving them their own author bio box.
They give a blog a complete look – Author bio boxes are becoming so commonly used that if a blog happens to lack one, it risks giving off an incomplete/unfinished look, which is something we’re sure none of you want your blog to be seen as.
They serve as a filter for your content – There are going to be cases in which someone is coming to your blog just to get the latest content from one specific author. Author bio boxes will simplify the process of filtering posts by author and will give the visitors exactly what they came for through one simple click on the author’s name, which will lead them to an organized display of the content created by his/her favorite author.
Tips for creating a great author bio box
Okay, now you know that adding an author bio box to your blog is important, one thing you should also know is that an author bio box needs to be created in the right way. In case you have never created one before, here are a few pointers on how to do it properly.
- Give the author a proper introduction by clearly stating who they are.
- In a friendly way, say why that author specifically is worth following and listening to.
- Always add at least some contact info for the author or a few of his/her social media links (if you have the permission, of course).
- Ask your authors to write a personal message, something that is engaging, humorous, but brief that will grab the reader’s attention.
- Add a professional but friendly-looking photo as a final touch.
How to add an author bio box using the Simple Author Box plugin?
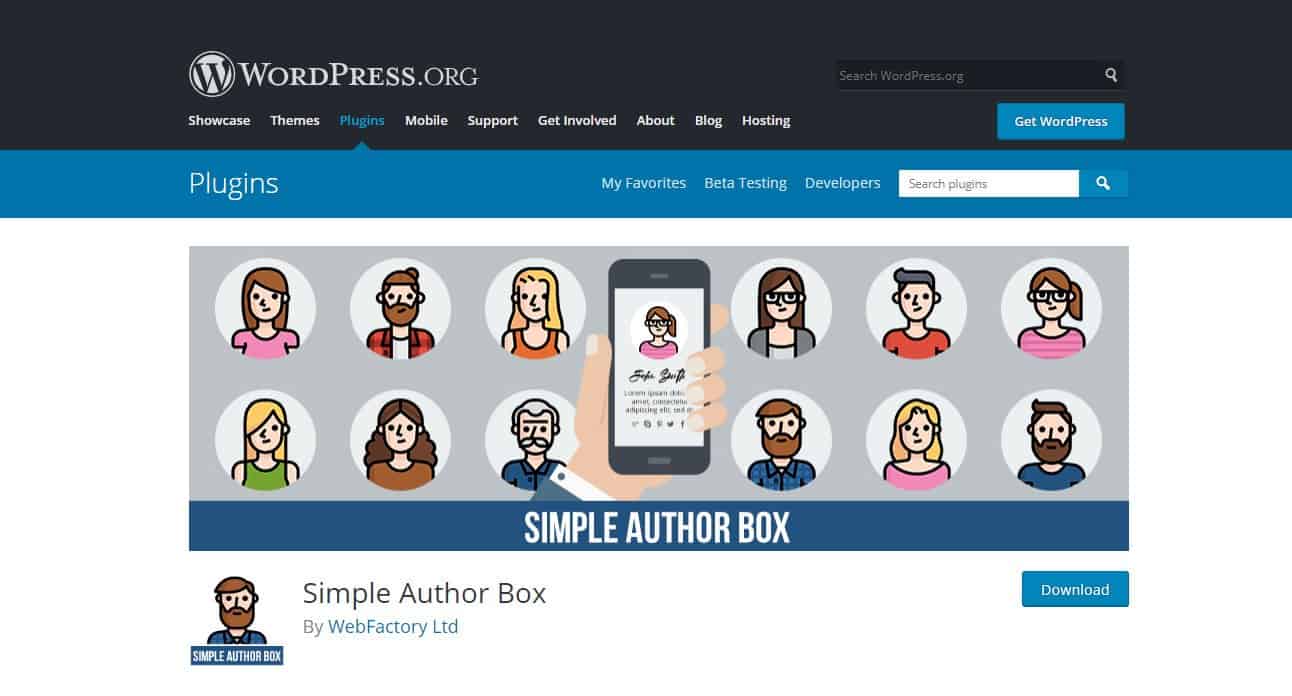
Simple Author Box is a plugin that will add a responsive author bio box at the end of your WordPress blog posts. In the box, it will display the author’s name, Gravatar, bio, and up to 30+ different social media icons and links. All the boxes you create using this plugin will be fully customizable and will look equally as good on any screen size.
The plugin works by adding the author bio box automatically or by allowing you to do it yourself (manually) by pasting PHP code into the template file of your site or a shortcode into your posts, but more on that later.
The plugin is available in a free version and a PRO one as well which is packed with advanced features such as a top authors widget, the option to add guest authors/co-authors, author box position, and social media icon style customizing, along with plenty of other ones as well.
Simple Author Box has over 40.000 active users, and its PRO version comes with a yearly fee of $29 + a 14-day money-back guarantee. To check out more about the plugin, visit the official Simple Author Box website. Now, let’s see how you can use this plugin to add an author bio box to your blog.
Steps to making it happen
Like with any plugin, the first step will be to install and activate the plugin. That can be done through the plugin section in your WordPress dashboard. After that is done, the plugin will receive its own section in your dashboard, so you’ll have no problem finding it at any time.
Once you enter the plugin’s section, you will be presented with a sample author bio box for a “John Doe.” On the top of the page, you’ll have the following options: Edit the author’s profile, change the author’s avatar, and add/edit social media icons. On the bottom, you’ll have tabs for tweaking things like the settings, appearance, colors, typography, and other miscellaneous things.

To add the author bio box to your blog, click the edit author profile option located at the top. You’ll then be taken to the Users section of your admin dashboard, to be more specific, into the “your profile” tab.
There you should fill in the information for your nickname, publicly displayed name, and biographical information. After you have done that, go to the bottom of the page, where you will see the following two sections: “Custom User Profile Image (Simple Author Box)” and “Social Media Links (Simple Author Box)”. Those need to be filled out as well.
If you want to add the author bio box for other users besides yourself, simply go into the Users section again, and pick the user for whom you want to fill in the mentioned pieces of information.
Once you have completed all the above-listed steps, click the “Update profile” to complete the author bio creation process.
To make aesthetic customizations, go again into the Simple Author Box plugin section and change things to fit your preferences. When it comes to the appearance of the author bio box, you’ll be able to make quite a number of customizations through the appearance, colors, and typography tab.
Now, if you go and look at any post that has an author, you should see an author bio box appear automatically at the bottom of it.
As we said, you can also insert the author bio box manually. That is done by going into the settings tab of the plugin and enabling the “manually insert the Simple Author Box” option. Copy the PHP code you are presented with and paste it into your template file or copy the shortcode and paste it anywhere you want in your posts, and you’re set.
Conclusion
In this article, we really did our best to explain the importance of adding author bio boxes to your blog. We also presented you with one of the best tools (Simple Author Box) that will enable you to do so in minutes without any hassle.
Taking all of that into consideration, we believe you are more than ready to start crediting yourself and your authors for your/their amazing work. Good luck, and don’t hesitate to give us your feedback!